Friday, October 29, 2021

Required if Validation in Laravel 6 with Example

 Required if Validation in Laravel 6 with Example

hii guys,

In this example,I will learn you how to use required if validation in laravel 6 application. i will create simple example of laravel 6 required if validation.you can simply use to required if validation in your project.

Controller Code

you will create the method in TestController.php file.

<?php

namespace App\Http\Controllers;

use Illuminate\Http\Request;

class TestController extends Controller

{

public function index()

{

return view('img');

}

public function store(Request $request)

{

$input=$request->all();

$request->validate([

'type'=>'required',

'name'=>'required_if:type,student',

'first_name'=>'required_if:type,employe',

'last_name'=>'required_if:type,employe',

]);

return redirect()->back();

}

}

Create View file

you will create the index.php file in the views directory.
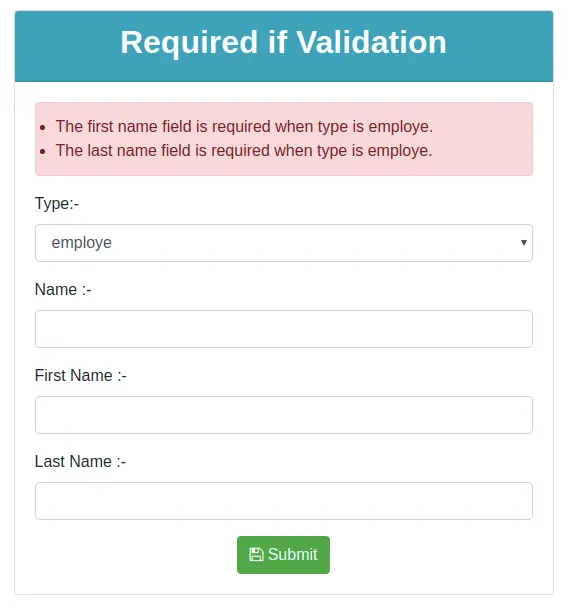
<!DOCTYPE html>

<html>

<head>

<title></title>

<link rel="stylesheet" href="https://stackpath.bootstrapcdn.com/bootstrap/4.3.1/css/bootstrap.min.css" integrity="sha384-ggOyR0iXCbMQv3Xipma34MD+dH/1fQ784/j6cY/iJTQUOhcWr7x9JvoRxT2MZw1T" crossorigin="anonymous">

<link rel="stylesheet" href="https://cdnjs.cloudflare.com/ajax/libs/font-awesome/4.7.0/css/font-awes

<script src="https://code.jquery.com/jquery-3.3.1.slim.min.js" integrity="sha384-q8i/X+965DzO0rT7abK41JStQIAqVgRVzpbzo5smXKp4YfRvH+8abtTE1Pi6jizo" crossorigin="anonymous"></script>

<script src="https://cdnjs.cloudflare.com/ajax/libs/popper.js/1.14.7/umd/popper.min.js" integrity="sha384-UO2eT0CpHqdSJQ6hJty5KVphtPhzWj9WO1clHTMGa3JDZwrnQq4sF86dIHNDz0W1" crossorigin="anonymous"></script>

<script src="https://stackpath.bootstrapcdn.com/bootstrap/4.3.1/js/bootstrap.min.js" integrity="sha384-JjSmVgyd0p3pXB1rRibZUAYoIIy6OrQ6VrjIEaFf/nJGzIxFDsf4x0xIM+B07jRM" crossorigin="anonymous"></script>

</head>

<body>

<div class="container">

<div class="row">

<div class="col-md-6 offset-3">

<div class="card mt-5">

<div class="card-header text-center bg-info">

<h2 class="text-white"> <strong>Required if Validation</strong></h2>

</div>

<div class="card-body">

@if (count($errors) > 0)

<ul class="alert alert-danger">

@foreach($errors->all() as $error)

<li>{{ $error }}</li>

@endforeach

</ul>

@endif

<form action="{{ route('image.store') }}" method="post">

@csrf

<div class="form-group">

<label>Type:- </label>

<select name="type" class="form-control">

<option value="">--select type--</option>

<option value="student" @if(old('type') == "student") {{ 'selected' }} @endif >student</option>

<option value="employe" @if(old('type') == "employe") {{ 'selected' }} @endif>employe</option>

</select>

</div>

<div class="form-group">

<label>Name :- </label>

<input type="text" name="name" class="form-control">

</div>

<div class="form-group">

<label>First Name :- </label>

<input type="text" name="first_name" class="form-control">

</div>

<div class="form-group">

<label>Last Name :- </label>

<input type="text" name="last_name" class="form-control">

</div>

<div class="text-center">

<button class="btn btn-success"><i class="fa fa-floppy-o" aria-hidden="true"></i> Submit </button>

</div>

</form>

</div>

</div>

</div>

</div>

</div>

</body>

</html>

It will help you....


Drag and Drop File Upload in Laravel 7/6 Using Dropzone.JS

 Drag and Drop File Upload in Laravel 7/6 Using Dropzone.JS

In this example, you will learn drag and drop file upload in laravel. step by step explain dropzone file upload laravel. you can see dropzone js in laravel. this example will help you multiple file upload laravel dropzone. So, let's follow few step to create example of upload file using dropzone in laravel.

In this tutorial, I will learn you how to multiple image upload using dropzone in laravel 7/6.you can easy and simply to upload image using dropzone js in laravel 7/6.

This tutorial shows you things step by step for uploading the images using dropzone in laravel 7/6.

step 1:- Setup Laravel Project

Bellow command used to you can install Laravel 7/6 project.

composer create-project --prefer-dist laravel/laravel blog

step 2:- configure this database in the .env file.

After you can configure your database in .env file and change the database name, username, password in the .env file.

DB_CONNECTION=mysql

DB_HOST=127.0.0.1

DB_PORT=3306

DB_DATABASE=Enter_Your_Database_Name(larave6_datatable)

DB_USERNAME=Enter_Your_Database_Username(root)

DB_PASSWORD=Enter_Your_Database_Password(root)

step 3:- Create Controller

you can create to controller in your project.This command is use to define in your terminal that create to controller,model and migration automatically.

php artisan make:controller ImageController -a

step 4:- Create Route

Add route in your route file.

routes/web.php

Route::get('/dropzone','ImageController@index');

Route::post('/dropzone/store','ImageController@store')->name('dropzone.store');

step 5:- Add Method In Controller

Now, you can write this code in controller file.

app/Http/Controller/ImageController.php

<?php

namespace App\Http\Controllers;

use Illuminate\Http\Request;

use App\Image;

class ImageController extends Controller

{

public function index()

{

return view('image');

}

public function store(Request $request)

{

$image = $request->file('file');

$avatarName = $image->getClientOriginalName();

$image->move(public_path('images'),$avatarName);

$imageUpload = new Image();

$imageUpload->filename = $avatarName;

$imageUpload->save();

return response()->json(['success'=>$avatarName]);

}

}

step 6:- Create Route

Add route in your route file.

Route::get('/dropzone','ImageController@index');

Route::post('/dropzone/store','ImageController@store')->name('dropzone.store');

step 7:- Create View File

Now, you will Create view file.

resources/views/image.blade.php

<!DOCTYPE html>

<html>

<head>

<meta charset="utf-8">

<title>Laravel 7/6 multiple image upload using dropzone - nicesnippets.com</title>

<link rel="stylesheet" href="{{asset('css/app.css')}}">

<link rel="stylesheet" href="https://maxcdn.bootstrapcdn.com/bootstrap/4.0.0/css/bootstrap.min.css">

<script src="https://code.jquery.com/jquery-3.2.1.slim.min.js"></script>

<script src="https://cdnjs.cloudflare.com/ajax/libs/popper.js/1.12.9/umd/popper.min.js"></script>

<script src="https://maxcdn.bootstrapcdn.com/bootstrap/4.0.0/js/bootstrap.min.js"></script>

<link rel="stylesheet" href="https://cdnjs.cloudflare.com/ajax/libs/dropzone/5.5.0/min/dropzone.min.css">

<script src="https://cdnjs.cloudflare.com/ajax/libs/dropzone/5.5.0/dropzone.js"></script>

</head>

<body>

<div class="container">

<h2>Laravel 6 multiple image upload using dropzone - nicesnippets.com</h2><br/>

<form method="post" action="{{ route('dropzone.store') }}" enctype="multipart/form-data"

class="dropzone" id="dropzone">

@csrf

</form>

</div>

<script type="text/javascript">

Dropzone.options.dropzone =

{

maxFilesize: 10,

renameFile: function (file) {

var dt = new Date();

var time = dt.getTime();

return time + file.name;

},

acceptedFiles: ".jpeg,.jpg,.png,.gif",

addRemoveLinks: true,

timeout: 60000,

success: function (file, response) {

console.log(response);

},

error: function (file, response) {

return false;

}

};

</script>

</body>

</html>

It will help you....

How to register multiple implementations of the same interface in Asp.Net Core?

 Problem: I have services that are derived from the same interface. public interface IService { } public class ServiceA : IService { ...